Files can be added as informational resources for users within your site. The access of these files can be controlled to specific roles and managed from a single area. This article explains how to add and edit files for the reference of users within your site.
- What are Files?
- How to Add a File
- Making a File Accessible to Users
- How to Edit a File
- How to Delete a File
- File Settings
- How to Download Uploaded Files
What are Files?
Files can be uploaded to provide access to templates and other resources to users within your site. Some examples of files uploaded for applicants and reviewers are:
- Program Information
- External resource files
- Templates (budget, essay, etc.)
- Score sheets/rubrics
- Ranking reports
Once files are added to your site a link will be generated so that a link to the resource can be created. This link can be used to create a hyperlink to display to users that when selected will begin downloading the file for the user selecting the link.
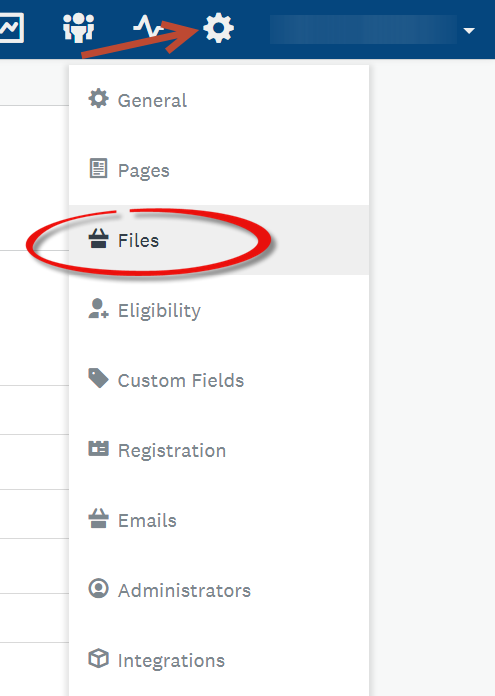
To navigate to the Files page:
- Select the Settings icon
- Select Files
How to Add a File
To add a file:
- Select the Settings icon
- Select Files
- Select the Upload File icon
- Select the file(s) from your computer's file manager
- Wait for the files to complete their upload
Once the file is added a unique link will be created which can then be used to create a link to the resource to provide access to the file.
To copy the location of a file:
- Select the More Options icon
- Select Copy URL
Making a File Accessible to Users
Access to files is only available when a link has been provided to a user. This can be given as a link through a program or task description, given through email, or other means. Instead of presenting the full link of the file, you can create a hyperlink that will download the file when selected by a user. We reference this as a link to the resource.
To create this link to a resource:
- Copy the file URL
- Highlight the text you wish to turn into a hyperlink.
- Select the Link icon from the formatting bar.
- Paste the file URL into the URL field
- Select OK
See our article How to Link to Pages and Files for details on customizing hyperlinks within your site.
How to Edit a File
A file can be edited at any point in time. File attributes that can be edited are the title and access.
To edit a file:
- From the Files page, select the More options icon for the file you wish to edit
- Click Edit
- Update the title or the file's access (hidden/visible)
- Select Save
How to Delete a File
Deleting a file will remove the ability for any user to access it within the site.
To delete a file:
- From the Files page, select the More Options icon
- Click Delete
- Confirm the deletion
To delete multiple files:
- Select the checkboxes of the files you wish to delete
- Select Actions
- Click Delete
Once a file is deleted it cannot be retrieved.
File Settings
When adding a new file the visibility of that file will be set to visible by default. As expected, visibility determines whether members within the site will have access to the file when it is cited throughout your site. There are two options when setting this access: Visible or Hidden.
| Visible Files |
Accessible if a link to the file has been provided to your users |
| Hidden files |
Will not be accessible even when the direct link has been provided to the file |
NOTE: Files can only be accessed by applicants, reviewers, and recommenders if they have been given the link directly or if a link to the file has been created. See Explaining the Visibility of Pages & Files for more information.
How to Download Uploaded Files
Once a file has been added to your site a link will need to be created to present the file to your users. When the link is selected the file will begin downloading to the user's computer for viewing.
Administrators will always have access to files that have been added through the Files page. To download a file as an administrator:
- Go to Files
- Select the More Options icon of the file you wish to download
- Select Download
If a link to the resource is not created, the file will not be accessible to any visitors to your site.